.:: Jasa Membuat Aplikasi Website,Desktop,Android Order Now..!! | | Order Now..!! Jasa Membuat Project Arduino,Robotic,Print 3D ::.

Create Dialog with options, using AlertDialog.Builder

0 komentar
Hi Guys!

In this tutorial I am sharing the code about the Alert Dialog with select option in android.
More details about the Alert Dialog visit the android developer site Alert Dialog

Lets start the coding part.

activty_main.xml


MainActivity.java

package com.sunil.alertdialogwithoption;

import android.app.Activity;
import android.app.AlertDialog;
import android.content.DialogInterface;
import android.os.Bundle;
import android.view.View;
import android.widget.Button;
import android.widget.Toast;

public class MainActivity extends Activity {
/** Called when the activity is first created. */
@Override
public void onCreate(Bundle savedInstanceState) {
super.onCreate(savedInstanceState);
setContentView(R.layout.activity_main);

Button buttonStartDialog = (Button)findViewById(R.id.button_alert);
buttonStartDialog.setOnClickListener(new Button.OnClickListener(){

@Override
public void onClick(View arg0) {
// TODO Auto-generated method stub
StartDialog();
}});
}

private void StartDialog(){
AlertDialog.Builder myAlertDialog = new AlertDialog.Builder(this);
myAlertDialog.setTitle("My Alert Dialog");
myAlertDialog.setMessage("It provide options for user to select");
myAlertDialog.setPositiveButton("Yes", new DialogInterface.OnClickListener() {

// do something when the button is clicked
public void onClick(DialogInterface arg0, int arg1) {
Toast.makeText(getApplicationContext(), "'Yes' button clicked", Toast.LENGTH_LONG).show();
}
});
myAlertDialog.setNeutralButton("Option 1", new DialogInterface.OnClickListener() {

// do something when the button is clicked
public void onClick(DialogInterface arg0, int arg1) {
Toast.makeText(getApplicationContext(), "'Option 1' button clicked", Toast.LENGTH_LONG).show();
}
});
myAlertDialog.setNegativeButton("NO", new DialogInterface.OnClickListener() {

// do something when the button is clicked
public void onClick(DialogInterface arg0, int arg1) {
Toast.makeText(getApplicationContext(), "'No' button clicked", Toast.LENGTH_LONG).show();
}
});
myAlertDialog.show();
}

}

 You can download the source code Alert Dialog.

Cheers Guys! 
Suni

AutoCompleteTextView

0 komentar
Hi Guys!
An AutoComplete TextView is an editable text view that shows completion suggestions automatically while the user is typing. The list of suggestions is displayed in a drop down menu from which the user can choose an item to replace the content of the edit box with.
The drop down can be dismissed at any time by pressing the back key or, if no item is selected in the drop down, by pressing the enter/dpad center key.

FOr detail about the Auto Complete Text View please visit the android developer site AutoCompleteTextView.

Now lets start the coding about the auto text complete view . Here we are getting the item data in array from xml resource.And these array data stored in the adapter.

res/value/myvalues.xml


January
February
March
April
May
June
July
August
September
October
November
December


activity_main.xml


MainActivity.java

package com.sunil.autocompletetext;

import android.app.Activity;
import android.os.Bundle;
import android.text.Editable;
import android.text.TextWatcher;
import android.widget.ArrayAdapter;
import android.widget.AutoCompleteTextView;

public class MainActivity extends Activity implements TextWatcher {

AutoCompleteTextView autoCompleteTextView;

/** Called when the activity is first created. */
@Override
public void onCreate(Bundle savedInstanceState) {
super.onCreate(savedInstanceState);
setContentView(R.layout.activity_main);
autoCompleteTextView = (AutoCompleteTextView)findViewById(R.id.input);
String[] month = getResources().getStringArray(R.array.month);
autoCompleteTextView.addTextChangedListener(this);
autoCompleteTextView.setAdapter(new ArrayAdapter(this, android.R.layout.simple_dropdown_item_1line, month));
}

@Override
public void afterTextChanged(Editable arg0) {
// TODO Auto-generated method stub

}

@Override
public void beforeTextChanged(CharSequence arg0, int arg1, int arg2,
int arg3) {
// TODO Auto-generated method stub

}

@Override
public void onTextChanged(CharSequence arg0, int arg1, int arg2, int arg3) {
// TODO Auto-generated method stub

}
}

 You can download the source code Auto Complete Text View

Cheers Guys!
Suni

TBx2 Blogger Template

0 komentar
Template Features
Platform TypeBlogger / Blogspot
Nama Template TBx2 Blogger Template
DeskripsiTBx2 Blogger Template adalah template blogger gratis yang ringan,  simple, motif yang sederhana, dilengkapi dengan social profiles seperti Facebook, twitter, Google plus, dll.
Template Authorhttp://wadahtutorial.blogspot.com/
Instruksi URL Cara Mengganti Template

TBx2 Blogger Template

Suni

Mengatasi Warning: At least one field must be set for HatomFeed

0 komentar
Warning: At least one field must be set for HatomFeed adalah salah satu pemberitahuan dari Rich snippets testing tools tentang kode blog Sobat yang kurang tepat.

Untuk memperbaikinya warning tersebut lakukan langkah dibawah ini :
  • Masuk ke akun blogger anda
  • Klik pada Template. (backup dulu template anda).
  • Selanjutnya, klik Edit HTML dan klik Proceed / Lanjutkan.
  • Beri tanda centang pada Expand Template Widget.
  • Tekan Ctrl + F di keyboard lalu cari kode hfeed, Sobat akan menemukan kode dibawah ini :
    <div class='blog-posts hfeed'>
  • Kalau sudah ketemu hapus hfeed pada kode di atas, jadi hasilnya seperti ini :
    <div class='blog-posts'>
    Biasanya ada dua kode hfeed, hapus aja dua-duanya Sob.
  • Terakhir klik Simpan Template, dan cek di Rich snippet tools.
Hanya itu tips dari saya tentang Mengatasi Warning: At least one field must be set for HatomFeed.
Suni

Template Toko Oline Gratis Part III

0 komentar
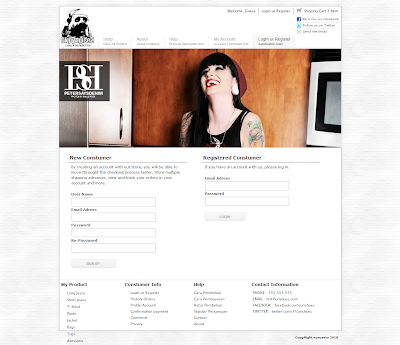
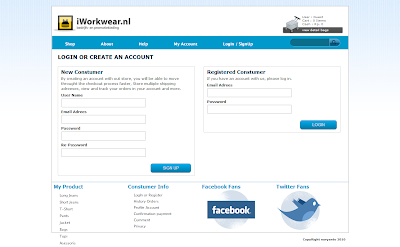
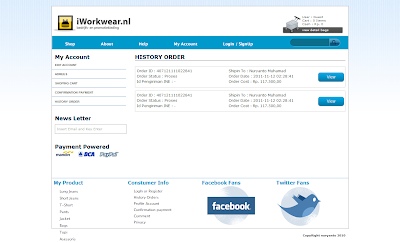
Buat agan - agan yang mau bikin aplikasi e-commerce / Aplikasi penjualan online berbasis website dengan tema sepatu, berarti ini pas banget buat agan, karena di sini saya mau share template toko online  yang ane bikin sendiri tentang tema penjualan sepatu.
Buat preview templete'ya :

contoh toko online
contoh toko online

contoh toko online

Oke silahkan download gan, thans for visit :)
Download File Disini

Suni

Cara Membuat Program Aplikasi Trial Dengan Batas Hari

0 komentar


Aplikasi trial adalah aplikasi yang mempunyai batasan waktu penggunaan berdasarkan lama hari atau berapa kali aplikasi dijalankan.
Pembuatanya biasanya digunakan pada aplikasi shareware (berbayar) yang bertujuan agar user dapat menikmati aplikasi (demo) sebelum membeli aplikasi.
Berikut ini adalah contoh pembuatan aplikasi trial yang menggunakan lama hari penggunaan, lengkap dengan prosedur input kode registrasinya.

PADA VB 6.0
Buat Project baru dengan sebuah Form. Di bagian '(Declarations)' dari Form ketikkan :
Const LocationReg = "System\Windows\User" 'lokasi penyimpanan d registry (ubah sesuai selera)
Const PasswordReg = "kode" 'kode kunci registrasi

Function GetInfoReg() As String 'fungsi utk mendapatkan info registrasi
On Error GoTo Ero
Dim Reg As Object
Set Reg = CreateObject("WScript.Shell")
GetInfoReg = Reg.RegRead("HKEY_CLASSES_ROOT\" & LocationReg & "\")
Exit Function
Ero:
Reg.RegWrite "HKEY_CLASSES_ROOT\" & LocationReg & "\", Format(Now, "short date") 'memasukkan tgl sekarang
GetInfoReg = Format(Now, "short date")
End Function


Function SuccessReg() As Boolean 'fungsi utk prosedur pemasukan kode registrasi
Dim s As String
Lagi:
s = InputBox("Masukkan kode registrasi", "Registrasi")
If s = PasswordReg Then
Dim Reg As Object
Set Reg = CreateObject("WScript.Shell")
Reg.RegWrite "HKEY_CLASSES_ROOT\" & LocationReg & "\", "Registered" 'mendaftarkan k registry
MsgBox "Terima kasih telah melakukan registrasi", vbInformation, "Registrasi Sukses"
SuccessReg = True
      
ElseIf s = "" Then
SuccessReg = False
  
Else
If MsgBox("Maaf kode registrasi salah, coba lagi ?", vbYesNo + vbExclamation, "Registrasi") = vbYes Then GoTo Lagi
SuccessReg = False
End If
End Function


Lalu di bagian 'Form_Load' ketikkan :
Dim s As String, l As Long
  
s = GetInfoReg
If s <> "Registered" Then 'jika belum terdaftar"
l = 30 - (CDate(Format(Now, "short date")) - CDate(s)) 'max penggunaan trial 30 hari
      
If l > 0 And l <= 30 Then 'jika masih ada sisa hari
If MsgBox("Aplikasi ini hanya dapat digunakan sampai " & l & " hari lagi." & vbCrLf & _
"Jika ingin menggunakan tanpa batasan waktu, masukkan kode registrasi" & vbCrLf & vbCrLf & _
"Masukkan kode registrasi sekarang ?", vbYesNo + vbInformation, "Registrasi") = vbYes Then SuccessReg
          
Else 'jika kadaluarsa
If MsgBox("Aplikasi ini sudah tidak dapat digunakan lagi." & vbCrLf & _
"Jika ingin menggunakannya kembali, masukkan kode registrasi" & vbCrLf & vbCrLf & _
"Masukkan kode registrasi sekarang ?", vbYesNo + vbExclamation, "Registrasi") = vbYes Then
              
If SuccessReg = False Then End 'mengakhiri aplikasi
Else
End 'mengakhiri aplikasi
End If
          
End If
End If


PADA VB.NET
Buat Project baru dengan sebuah Form. Di bagian '(Declarations)' dari Form ketikkan :
Const LocationReg = "System\Windows\User" 'lokasi penyimpanan d registry (ubah sesuai selera)
Const PasswordReg = "kode" 'kode kunci registrasi
Function GetInfoReg() As String 'fungsi utk mendapatkan info registrasi
Dim Reg = CreateObject("WScript.Shell")
Try
GetInfoReg = Reg.RegRead("HKEY_CLASSES_ROOT\" & LocationReg & "\")
Catch
Reg.RegWrite("HKEY_CLASSES_ROOT\" & LocationReg & "\", Now.Date) 'memasukkan tgl sekarang
GetInfoReg = Now.Date
End Try
End Function
Function SuccessReg() As Boolean 'fungsi utk prosedur pemasukan kode registrasi
Dim s As String
Lagi:
s = InputBox("Masukkan kode registrasi", "Registrasi")
If s = PasswordReg Then
Dim Reg = CreateObject("WScript.Shell")
Reg.RegWrite("HKEY_CLASSES_ROOT\" & LocationReg & "\", "Registered") 'mendaftarkan k registry
MsgBox("Terima kasih telah melakukan registrasi", vbInformation, "Registrasi Sukses")
SuccessReg = True

ElseIf s = "" Then
SuccessReg = False

Else
If MsgBox("Maaf kode registrasi salah, coba lagi ?", vbYesNo + vbExclamation, "Registrasi") = vbYes Then GoTo Lagi
SuccessReg = False
End If
End Function

Lalu di bagian 'Form1_Load' ketikkan :
Dim s As String, l As Long

s = GetInfoReg()
If s <> "Registered" Then 'jika belum terdaftar"
l = 30 - CType(Now.Date - CDate(s), TimeSpan).TotalDays 'max penggunaan trial 30 hari

If l > 0 And l <= 30 Then 'jika masih ada sisa hari
If MsgBox("Aplikasi ini hanya dapat digunakan sampai " & l & " hari lagi." & vbCrLf & _
"Jika ingin menggunakan tanpa batasan waktu, masukkan kode registrasi" & vbCrLf & vbCrLf & _
"Masukkan kode registrasi sekarang ?", vbYesNo + vbInformation, "Registrasi") = vbYes Then SuccessReg()

Else 'jika kadaluarsa
If MsgBox("Aplikasi ini sudah tidak dapat digunakan lagi." & vbCrLf & _
"Jika ingin menggunakannya kembali, masukkan kode registrasi" & vbCrLf & vbCrLf & _
"Masukkan kode registrasi sekarang ?", vbYesNo + vbExclamation, "Registrasi") = vbYes Then

If SuccessReg() = False Then End 'mengakhiri aplikasi
Else
End 'mengakhiri aplikasi
End If

End If
End If

Suni

Template Toko Online Gratis Part II

0 komentar
Ane share lagi nih gan templeate e-commerce yang ane bikin sendiri, silahkan download gan. pokok'ya komplit tuh halaman templeate'ya.
Lumayan buat referensi agan buat design halaman website khususnya buat halaman website penjualan online / penjualan e-commerce dan itu template toko online gratis buat agan.


preview templeate yang ane bikin :


template toko online gratis
contoh toko online

Silahkan download gan, Download File Disini
Suni

Template Toko Online Gratis

0 komentar
Iseng - iseng buka komputer lama d rumah, eh ternyata ada templeate yang pernah saya bikin yaitu templeate untuk program Toko Online.
Dari pada file templeate tersebut tidak bermanfaat mending saya bagi'in aja ke temen-temen, barang kali butuh referensi buat design website dan ane bagi  template toko online secara gratis. hehehehhe.


Buat review templeate yang ane bikin.


Template Toko Online Gratis


Template Toko Online Gratis

Silahkan download aja gan, itu halaman'ya komplit, semua kebutuhan halaman baik client ama admin sudah ada ko. selamat download.
Download file disini
Suni

Intent of "MediaStore.ACTION_IMAGE_CAPTURE"

0 komentar
Using Intent of "MediaStore.ACTION_IMAGE_CAPTURE", we can request Android build-in Camera App or other Service Provider to take picture.

main.xml

<?xml version="1.0" encoding="utf-8"?>
<LinearLayout xmlns:android="http://schemas.android.com/apk/res/android"
   android:orientation="vertical"
   android:layout_width="fill_parent"
   android:layout_height="fill_parent"
   >
<TextView
   android:layout_width="fill_parent"
   android:layout_height="wrap_content"
   android:text="@string/hello"
   />
<Button
   android:id="@+id/captureimage"
   android:layout_width="fill_parent"
   android:layout_height="wrap_content"
   android:text="Call for ACTION_IMAGE_CAPTURE"
   />
<ImageView
   android:id="@+id/imagecaptured"
   android:layout_width="wrap_content"
   android:layout_height="wrap_content"
   />
</LinearLayout>
 
AndroidImageCapture.java


package com.AndroidImageCapture;
 
import android.app.Activity;
import android.content.Intent;
import android.graphics.Bitmap;
import android.os.Bundle;
import android.view.View;
import android.widget.Button;
import android.widget.ImageView;
 
public class AndroidImageCapture extends Activity {
  
 ImageView imageiewImageCaptured;
  
   /** Called when the activity is first created. */
   @Override
   public void onCreate(Bundle savedInstanceState) {
       super.onCreate(savedInstanceState);
       setContentView(R.layout.main);
       Button buttonImageCapture = (Button)findViewById(R.id.captureimage);
       imageiewImageCaptured = (ImageView)findViewById(R.id.imagecaptured);
       
       buttonImageCapture.setOnClickListener(buttonImageCaptureOnClickListener);
   }
   
   Button.OnClickListener buttonImageCaptureOnClickListener
   = new Button.OnClickListener(){
 
  @Override
  public void onClick(View arg0) {
   // TODO Auto-generated method stub
   Intent intent = new Intent(android.provider.MediaStore.ACTION_IMAGE_CAPTURE);
   startActivityForResult(intent, 0);
    
  }};
 
 @Override
 protected void onActivityResult(int requestCode, int resultCode, Intent data) {
  // TODO Auto-generated method stub
  super.onActivityResult(requestCode, resultCode, data);
   
  if (resultCode == RESULT_OK)
  {
   Bundle extras = data.getExtras();
   Bitmap bmp = (Bitmap) extras.get("data");
   imageiewImageCaptured.setImageBitmap(bmp);
  }
   
 }
}
 

MediaStore.ACTION_IMAGE_CAPTURE
 Cheers Guys!!!!!!!!!!!

I love your comment here...
 
Suni

ProgressDialog

0 komentar
Hi Guys!

Today I am going to share the code about the ProgressDialog in android.
A dialog showing a progress indicator and an optional text message or view. Only a text message or a view can be used at the same time.
More About the progress dialog and progress bar then visit the android developer site Progress Dialog.

Now lets start the coding about the progress dialog in android that will execute inside the doInBackground() of Asynctask till.

activity_main.xml


MainActivity.java

package com.sunil.progressdialog;

import android.app.Activity;
import android.app.ProgressDialog;
import android.os.AsyncTask;
import android.os.Bundle;
import android.os.SystemClock;
import android.view.View;
import android.widget.Button;
import android.widget.ProgressBar;
public class MainActivity extends Activity {

Button buttonStart;
ProgressBar progressBar;
ProgressDialog progressDialog;

/** Called when the activity is first created. */
@Override
public void onCreate(Bundle savedInstanceState) {
super.onCreate(savedInstanceState);
setContentView(R.layout.activity_main);
buttonStart = (Button)findViewById(R.id.start);
progressBar = (ProgressBar)findViewById(R.id.progressbar);

buttonStart.setOnClickListener(new Button.OnClickListener(){
@Override
public void onClick(View arg0) {
// TODO Auto-generated method stub
buttonStart.setClickable(false);
new asyncTaskUpdateProgress().execute();
}

});

}
public class asyncTaskUpdateProgress extends AsyncTask {
int progress1;

@Override
protected void onPostExecute(Void result) {
buttonStart.setClickable(true);
progressDialog.dismiss();
}
@Override
protected void onPreExecute() {
progress = 0;
progressDialog = ProgressDialog.show(MainActivity.this, "ProgressDialog", "Running");
}
@Override
protected void onProgressUpdate(Integer... values) {
progressBar.setProgress(values[0]);
}
@Override
protected Void doInBackground(Void... arg0) {
while(progress1<100 data-blogger-escaped-null="" data-blogger-escaped-pre="" data-blogger-escaped-progress1="" data-blogger-escaped-publishprogress="" data-blogger-escaped-return="" data-blogger-escaped-systemclock.sleep=""> 
 You can download the source code Progress Dialog
 
Cheers Guys! 
Suni

Spinner

0 komentar
Hi Guys!!

Today I am sharing the code about the Spinner in android.
Spinners provide a quick way to select one value from a set. In the default state, a spinner shows its currently selected value. Touching the spinner displays a dropdown menu with all other available values, from which the user can select a new one.
For detail please visit android developer site Spinner.

So lets start the coding about the spinner in android.

activity_main.xml


MainActivity.java

package com.sunil.spinner;

import android.app.Activity;
import android.os.Bundle;
import android.widget.ArrayAdapter;
import android.widget.Spinner;

public class MainActivity extends Activity {

private static final String[] dayOfWeek =
{"Sunday", "Monday", "Tuesday", "Wednesday",
"Thursday", "Friday", "Saturday"};
private ArrayAdapter adapter;

/** Called when the activity is first created. */
@Override
public void onCreate(Bundle savedInstanceState) {
super.onCreate(savedInstanceState);
setContentView(R.layout.activity_main);
Spinner spinner = (Spinner)findViewById(R.id.spinner);

adapter = new ArrayAdapter(this, android.R.layout.simple_spinner_item, dayOfWeek);
adapter.setDropDownViewResource(android.R.layout.simple_spinner_dropdown_item);
spinner.setAdapter(adapter);
}
}

 You can download the source code Spinner. 

Cheers Guys!!
Suni

TimePickerDialog

0 komentar
Hi Guys!

A view for selecting the time of day, in either 24 hour or AM/PM mode. The hour, each minute digit, and AM/PM (if applicable) can be conrolled by vertical spinners. The hour can be entered by keyboard input. Entering in two digit hours can be accomplished by hitting two digits within a timeout of about a second . The minutes can be entered by entering single digits.

For more details you can visit the android developer site Timer Picker
Now lets start the coding about the Time Picker android.

acivity_main.xml


MainActivity.java

package com.sunil.timepickerdialog;

import java.util.Calendar;
import android.app.Activity;
import android.app.Dialog;
import android.app.TimePickerDialog;
import android.os.Bundle;
import android.view.View;
import android.widget.Button;
import android.widget.Toast;

public class MainActivity extends Activity {

private int hour, minute;
static final int ID_TIMEPICKER = 0;

/** Called when the activity is first created. */
@Override
public void onCreate(Bundle savedInstanceState) {
super.onCreate(savedInstanceState);
setContentView(R.layout.activity_main);

Button startTimePicker = (Button)findViewById(R.id.starttimepicker);
startTimePicker.setOnClickListener(new Button.OnClickListener(){
@Override
public void onClick(View arg0) {

final Calendar c = Calendar.getInstance();
hour = c.get(Calendar.HOUR_OF_DAY);
minute = c.get(Calendar.MINUTE);
showDialog(ID_TIMEPICKER);
}});
}
@Override
protected Dialog onCreateDialog(int id) {

switch(id){
case ID_TIMEPICKER:
return new TimePickerDialog(this, timeSetListener, hour, minute, false);
default:
return null;
}
}
private TimePickerDialog.OnTimeSetListener timeSetListener
= new TimePickerDialog.OnTimeSetListener(){
@Override
public void onTimeSet(android.widget.TimePicker arg0, int arg1, int arg2) {
// TODO Auto-generated method stub
Toast.makeText(getBaseContext(), String.valueOf(arg1) + ":" + String.valueOf(arg2), Toast.LENGTH_LONG).show();
}};
}


 You can download the source code Time Picker
Suni

DatePickerDialog

0 komentar
Hi Guys!
Today I am going to share about the code of Date Picker in Android.
This class is a widget for selecting a date. The date can be selected by a year, month, and day spinners or a CalendarView. The set of spinners and the calendar view are automatically synchronized. The client can customize whether only the spinners, or only the calendar view, or both to be displayed. Also the minimal and maximal date from which dates to be selected can be customized.
For detail about the Date Picker you can visit the android developer site Date Picker.

So lets start the coding about the date picker android.

activity_main.xml


MainAcivity.java

package com.sunil.datepicker;

import java.util.Calendar;

import android.app.Activity;
import android.app.DatePickerDialog;
import android.app.Dialog;
import android.os.Bundle;
import android.view.View;
import android.widget.Button;
import android.widget.Toast;

public class MainActivity extends Activity {

private int year, month, day;
static final int ID_DATEPICKER = 0;

/** Called when the activity is first created. */
@Override
public void onCreate(Bundle savedInstanceState) {
super.onCreate(savedInstanceState);
setContentView(R.layout.activity_main);

Button startDatePicker = (Button)findViewById(R.id.startdatepicker);
startDatePicker.setOnClickListener(new Button.OnClickListener(){

@Override
public void onClick(View arg0) {
// TODO Auto-generated method stub
final Calendar c = Calendar.getInstance();
year = c.get(Calendar.YEAR);
month = c.get(Calendar.MONTH);
day = c.get(Calendar.DAY_OF_MONTH);
showDialog(ID_DATEPICKER);
}});
}

@Override
protected Dialog onCreateDialog(int id) {
switch(id){
case ID_DATEPICKER:
return new DatePickerDialog(this, dateSetListener, year, month, day);
default:
return null;
}
}

private DatePickerDialog.OnDateSetListener dateSetListener
= new DatePickerDialog.OnDateSetListener(){

@Override
public void onDateSet(android.widget.DatePicker arg0, int arg1,int arg2, int arg3) {

Toast.makeText(getBaseContext(), String.valueOf(arg1) + "/" + String.valueOf(arg2+1) + "/" + String.valueOf(arg3),Toast.LENGTH_LONG).show();
}
};
}


You can download the source code Date Picker
Suni

How to setup VPN in Windows 8

0 komentar

How to setup VPN in Windows 8


Set up a VPN (Virtual Private Network) could be done in less than 5 minutes. The steps are very simple. You need the IP address, the username and the password. That is all.

1. First, you need to access the Windows 8 Control Panel. Using the search Apps or from the classic desktop.
Control Panel

Search for Control Panel in Windows 8


2. Then, you need to open the Network and Sharing Center.

Network and Sharing Center


3. Set up a new connection or network

Set up a new connection or network


4. Connect to a workplace , Setup a dial-up or VPN connection to your workplace
Setup a dial-up or VPN connection to your workplace


5. Use my Internet connection (VPN), Connect using a virtual network (VPN) connection trough the Internet.
Connect using a virtual network (VPN) connection trough the Internet


6. You have to enter the IP address from your remote network.
enter the IP address


7. The ip address for my example is 70.83.164.24 ; Press Create to continue.
enter the IP address


8. Your VPN is now ready. On your right palette, you should see this picture:
Networks


9. You need this view to connect. To reach this view, you could use the windows 8 search tools. Search under the settings and look for VPN. Click on Connect to a network.
Connect to Networks


Or from the classic desktop, click on the network icon.
network icon


10. Click on VPN Connection to Distant Server and Connect. Enter your UserName and your Password.

VPN Connection to Distant Server and Connect

VPN Connection to Distant Server and Connect


11. This might take some time, maybe 1 minute. When the VPN is connected and ready you should see this picture.

VPN Connection to Distant Server and Connect


12. Your computer is now part of your workplace; please note that you could only connect to other computer with their IP address and not with the computer name.
computer with their IP address


Suni

Tawk.to